
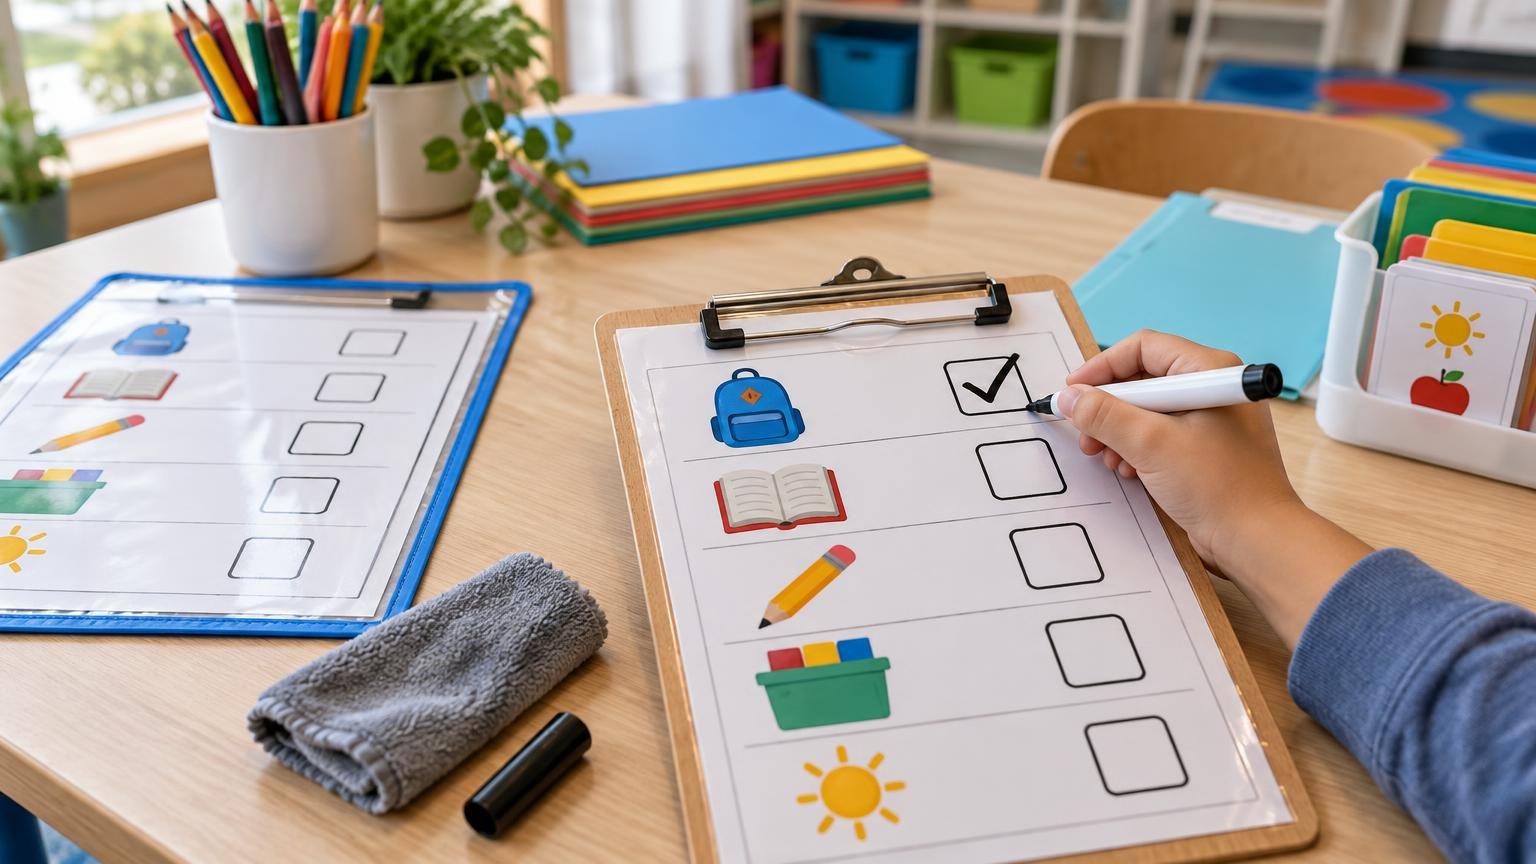
TLDR: Keep the checklist focused on one routine, write one short action per row, pair simple icons with words when useful, and leave generous room for marking. Test one copy at actual size before making a class set. Choose lamination, a dry-erase sleeve, a clipboard, magnets, or binder-ring cards according to where the routine happens. Most importantly, teach and practice the routine before expecting the printed prompt to carry it.
Well-designed reusable classroom checklists can reduce repeated verbal prompting and give students a visible way to follow a familiar routine. They work best as reminders for a process that has already been explained, modeled, and practiced—not as substitutes for instruction.
The physical details matter. A checklist that looks neat on a computer may have boxes that are awkward to mark, text that is difficult to read from the intended location, or a laminated surface that reflects overhead lights. A one-copy trial helps you correct those problems before spending time and materials on a full set.
Choose one job for each checklist
Start by naming the exact moment when students will use the checklist. “Classroom routine” is too broad. “Pack backpack before dismissal” or “Reset the counting center” gives you a defined sequence, location, and group of users.
Good uses include arrival, center setup, clean-up, classroom jobs, independent work, supply checks, pack-up, and transitions between activities. For example, a checklist beside printable number mats in a counting center might cover taking out the counters, completing the activity, returning the pieces, and clearing the workspace.
Avoid combining unrelated routines merely to save paper. A student working at a center should not have to scan past arrival and dismissal directions. A short checklist placed at the point of use is usually easier to navigate and simpler to update.
Build a simple student-facing layout
Use a clear title followed by one action per row. Begin each step with a verb: “Get your folder,” “Write your name,” “Return the cards,” or “Push in your chair.” Keep wording consistent so students do not have to interpret a different sentence pattern on every line.
- Give the checklist one clear purpose.
- Keep the number of steps limited to what students need at that moment.
- Place one action and one checkbox on each row.
- Use plain, specific directions instead of broad instructions such as “Get ready.”
- Leave enough white space to separate adjacent steps.
- Add a clear final cue such as “Finished,” “Ready,” or “Ask for a check.”
If a direction contains several actions, consider splitting it. “Put away the book, sharpen a pencil, and sit on the carpet” creates uncertainty about when the box should be checked. Three rows make progress easier to see and help you identify which part of the routine needs clarification.
Size checkboxes for the student and marking tool
There is no universal best checkbox measurement for children. The practical size depends on the intended student, the marker tip, the amount of motor control required, and whether the sheet will be used on a desk, wall, clipboard, or vertical station.
Make a draft, print it at 100 percent, and try marking every box with the actual tool. A box should accept a quick check, dot, line, or cross without forcing the mark into the neighboring text. Also test whether a student can hold the checklist steady while marking it. More row spacing or a clipboard may solve a handling problem better than simply enlarging the box.
Check the final print settings before approving the design. Options such as “fit to page” can shrink the text, icons, spacing, and checkboxes. If several checklists share one sheet, cut a sample card and handle it as a student would before producing the rest.
Use icons as cues, not decoration
An icon can make a step faster to recognize, especially when it depicts a familiar object or location. Pair it with a short written label when possible. CAST’s Universal Design for Learning guidance emphasizes multiple ways to perceive information and the value of clarifying language and symbols. This supports a practical approach in which pictures and words reinforce one another rather than relying on unexplained symbols alone.
Use the same visual language throughout the room. If a blue bin represents finished work on one checklist, use that same bin image or symbol wherever the action appears. Avoid filling every row with decorative clip art; visuals should help students distinguish steps.
Text-forward checklists may be better for older students or tasks requiring nuance. Visuals are more useful for concrete actions such as hanging a backpack, selecting a folder, washing hands, or returning materials. The choice should reflect the routine and the students rather than a rule that every classroom checklist needs pictures.
Choose the right reusable format
| Format | Best suited to | Main tradeoff |
|---|---|---|
| Laminated sheet | Stable routines used repeatedly in one location | Durable and wipeable, but glare and marker compatibility require testing |
| Dry-erase sleeve | Lists that change or need replaceable paper inserts | Fast to update, although sleeves can shift or add bulk |
| Clipboard | Portable routines, room checks, and student jobs | Easy to carry and mark, but markers need secure storage |
| Magnetic pieces | Managed boards with steps that move between columns | Progress is visible, but detachable parts can be lost |
| Binder-ring cards | Short routines used in several locations | Compact and easy to flip, though rings and cards may be awkward during writing |
| Uncovered replaceable sheet | Frequently changing information or low-cost trials | Easy to revise, but less resistant to handling and spills |
Lamination or a dry-erase sleeve?
Laminate a checklist when the content is stable and the card needs to withstand frequent handling. Rounded corners can make cut cards more comfortable to handle, but any trimming should leave the sealed border intact according to the pouch and laminator instructions.
Use a dry-erase sleeve when you expect to revise the steps, swap lists among groups, or place a dated paper behind the reusable surface. A sleeve also lets you test a design before committing to lamination. Check the marker on the actual sleeve or laminate because erasability, ghosting, and staining vary by material and marker.
Clipboards, magnets, and rings
Clipboards suit routines that move around the room, such as checking shelves, preparing stations, or completing classroom jobs. Attach marker storage only if it does not create a dangling distraction or snag. A hook-and-loop tab, short holder, or nearby marker cup may be more practical than tying a long cord to the board.
Magnetic steps work well on a managed board when students move each completed action to a “done” column. Binder-ring cards can divide a routine into one step per card and are easy to store on a hook. Magnets, rings, marker caps, and other detachable components require age-appropriate supervision and classroom-specific safety judgment.
Place reusable classroom checklists where the action happens
A checklist is useful only if students can find and read it at the relevant moment. Place an arrival list near cubbies, center directions at the center, a clean-up card beside the material shelf, and a pack-up list where bags or take-home folders are handled.
The Institute of Education Sciences participant guide describes picture schedules, checklists, and combined words and pictures as possible supports for classroom and center routines. It also stresses visible displays, explicit modeling, discussion, and student practice. The full IES participant guide on classroom routines and differentiated instruction provides the educational context behind those recommendations.
Check visibility from the student’s actual position. A wall card that adults can read while standing may be too high or too distant for a child seated on the floor. Watch for glare from windows and ceiling lights, particularly on glossy laminate. If students must leave the task area to consult the instructions, consider a smaller duplicate card, clipboard, or ring set.
Teach the marking and reset routine
Show students what the mark means. Depending on the task, they might check a step immediately after completing it, move a magnet, flip a card, or slide a clip to the next action. Demonstrate where the marker belongs and what happens when every step is complete.
Include resetting in the routine. Decide whether the student erases the marks, turns in the checklist, or leaves it for an adult or classroom helper. If resetting is nobody’s assigned task, even a good checklist will eventually be unavailable or covered in old marks.
- Model the complete routine while referring to each printed step.
- Practice the routine with students rather than merely displaying the list.
- Prompt students to consult the checklist before repeating the directions verbally.
- Observe where they pause, skip a row, or handle the materials awkwardly.
- Revise the words, order, placement, or physical format based on that observation.
Clean and store reusable checklists realistically
Routine erasing is not necessarily the same task as sanitizing or disinfecting. The CDC-hosted Cleaning for Healthier Schools handbook distinguishes cleaning, sanitizing, and disinfecting, although that handbook was published in 2010. Follow current school or district procedures and the labels for the surface, marker, and cleaning product rather than treating one cleaning method as suitable for every material.
Test any cleaner on a sample or inconspicuous corner. Confirm that it removes marker without clouding the laminate, weakening an edge, stripping printed ink exposed by a cut, or leaving a slippery residue. Keep liquids away from unsealed paper edges and electronic equipment.
Store flat sheets in a labeled folder or tray. Hang clipboards and ring cards at their point of use when appropriate. Keep each marker with the correct surface so a permanent marker is less likely to reach a dry-erase checklist. An inexpensive checklist is not truly reusable if its marker is routinely missing.
Troubleshoot the routine before redesigning everything
If students ignore a checklist, first determine whether they can see it, understand it, reach it, and use the marking tool. A location or handling problem may look like a comprehension problem. If students consistently stop at the same row, simplify its wording, replace an unclear icon, or divide the action into smaller steps.
If the list feels overwhelming, show only the steps needed for the current part of the routine. If students complete the task but forget to mark it, reconsider whether marking every action is necessary. The checklist should make the routine easier to manage, not add a second complicated routine.
A reusable reward or completion cue can be kept separate from the task directions. For example, printable classroom coupons can serve as a distinct recognition system without crowding the checklist with reward language.
Run this pre-print test
- The title identifies one specific routine.
- Every row contains one clear action.
- Text and icons are understandable at actual print size.
- Checkboxes work with the intended marker and student grip.
- The checklist fits its clipboard, sleeve, board, hook, or storage location.
- The reusable surface erases without obvious staining during the trial.
- The card remains readable under the lighting where it will be used.
- Students can reach the checklist and marking tool safely.
- Someone is responsible for resetting, cleaning, and replacing supplies.
- Small or detachable components are appropriate for the setting.
- One trial copy has been used before producing the full set.
Make one working copy before a class set
The best next step is not laminating 30 copies. Print one checklist, place it where the routine occurs, and test it with the actual marker, lighting, mounting method, and storage plan. Teach the routine, observe where the prompt helps or gets in the way, and revise the design.
Once the trial works, reproduce only the number you need. That simple test protects your paper, laminate, ink, and preparation time while producing a checklist students can realistically find, handle, mark, and reset.